Sunday, August 28, 2011

Bath Bomb


Supplies:
2 Cups Baking Soda
1 Cup Citric Acid
4 teaspoons massage oil ( or 2 teaspoons essential oil and 2 teaspoons olive oil)
Spray bottle with water
Mmold (60 mm 2 part plastic ball) (I am also thinking the bottoms of two large Easter eggs could be used)

This amount only made 5 bath bombs. If I was making more I would buy the citric acid online in bulk. The small bottle purchased at a local health food sotre cost $2.50.

Directions:
Mix baking soda and citric acid in large mixing bowl. Mix very well! You can use an electric mixer if you like.

Add in 4 teaspoons of scented massage oil (or other combination of skin safe essential oil for scent and another oil for moisturizing the skin). The scent is personal, so start with a teaspoon or so and add more until you are satisfied. Mix well.

This next step can be a bit tricky because you don't want your bath bomb to start fizzing. Start by adding a couple of fine mist sprays of water to your mixture and mix well.

You will continue spraying until the mixture will clump in your hand when squeezed. (I used 5-8 sprays, however this will depend greatly on your local climate)

Fill one half of your mold. Pack it tightly. Fill the other half of the mold and place them together---don't snap together. I slightly overfilled each half. When I pushed the two halves together they became a ball.

Gently remove the ball from mold. If I had problems with the ball coming out easily I dumped the mixture back into my bowl, added a mist of water (carefully), mixed well and then tried again.

Saturday, August 27, 2011

Tiny Pinata


These are from the October 2001 issue of Martha Stewart Living. In that project they are made as small jack’o'lanterns, skulls, or small orange candy containers. I figured they’d work well as an interesting gift container for anything small. I also plan on using these for easter eggs.

A few tips from my experience:

I used straight laundry starch because I had some lying around the house, and it worked great, created a nice hard shell. I’m sure the same thing can be done with white glue mixed with water or homemade wheat paste. For a more permanent decoration I’m sure modge podge would be perfect. The project in the magazine calls for wheat paste powder from a hardware store but that’s going a bit far.

I used the instructions for the skull project – which is to tear petal-sized pieces of tissue paper, so the rough edges will form a seamless look.

When starting I didn’t brush any starch on the balloon itself, I just put the tissue paper down and brushed over it, and over the edges to the balloon. For the subsequent layers I went crazy with the starch. This seemed to allow the balloon to pull itself free more easily. I had no troubles with the shell collapsing.

I hung mine to dry by hanging it from a loop of string. They hung from my overhead light. They took a few hours to dry. I left mine to hang overnight and they were dry all the way through.

I tested how different numbers of layers worked. The magazine project called for four, which seems very sturdy and that was fine. Anything less is too delicate to hold anything inside.

Popping the balloon calls for grasping it tightly just above the knot, cutting a tiny hole and allowing the air to flow out slowly. Hold the shell loosely in your other hand and let the balloon pullitself free. In my experience the balloons pulled away from the inside without and trouble and came right out.

I’m planning on putting small presents, small candies and large tissue paper confetti inside of these. But I think they would be great as easter eggs, romantic notes, to hold battery powered lights.

For Valentine’s Day I made little balloons, pasted on two layers of yellow and one layer of red. I left the opening as a long thin gash rather than a round hole, this helped create a seamless look at the end, instead of a flat papered over area. The first ones I gave as gifts were just sealed and were hard to start to rip open. So I added a pull string which will start the hole. After I stuffed them, I put a loop of string halfway into the shell and papered around it. It works pretty well.

They were a lot of messy fun to make. Oh, and warning: the dye will work itself onto your fingers, but it comes right off, almost.

Thursday, August 25, 2011

Chocolate Party Spoons


Chocolate Party Spoons

Paper Top


Directions:
To make these paper tops you will need some old newspapers and toothpicks.

1. Mark and cut the newspapers in even stripes.

2. Glue ends of stripes to each other so you get one long strip (in a nice messy pile).

3. Glue the stripe to the toothpick and start wrapping. Make sure to tighten the paper every once in a while as much as you can. The tighter the better.

4. Once it is finished, you can adjust the shape to a cone if you wish.

Spin, spin, spin!


Saturday, August 6, 2011

Curly Birds


Directions

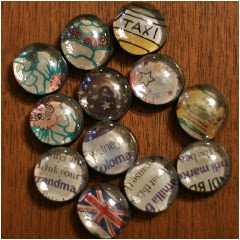
Marble Magnets


DIRECTIONS

Potato Stamps


DIRECTIONS

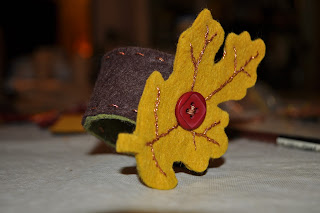
Leaf Napkin Rings


DIRECTIONS

Aut-yum leaves (LOTR)


DIRECTIONS

Pressed Leaf Butterflies


DIRECTIONS

Cookie Cutter Chips (LOTR)


DIRECTIONS

Holiday Card Ornaments (fan photo spheres)


DIRECTIONS

Charming Companions (Golem)


DIRECTIONS

Squash Softies


DIRECTIONS